Disassembling the Cassette Mechanism & Changing the Belts
Method 1 – Cut & Splice Wires
This tutorial goes through the first, and in my opinion, easier method of opening the cassette mechanism. It involves cutting and splicing 2 wires, rather than attempting to desolder them at the ends, which is possible but tricky to do in a cramped area, and that method opens you up to possible damage to one of the the leaf spring mechanisms and or surrounding wire insulation. I will be detailing that method in a future tutorial as it keeps the stock wires intact, but for most people I recommend the method detailed here in cutting and splicing wires.
If you haven’t already, follow this tutorial to open up your camera:
https://pxl2k.com/first-disassembly/
You will need:
Soldering iron and soldering skills PXL-2000 Belt Kit Wire Cutter & Stripper Small phillips head screwdriver A short length of wire Heat shrink tubing Heat gun String or thread Isopropyl alcohol
If you do not have a heat gun you can alternatively use a butane torch lighter (held quite far away) to heat the shrink tubing. Do not use a soft flame bic style lighter. It will leave soot on your camera.
Mark one of the two wires and snip them. We will later use a lineman splice to reconnect them. If you have an auto-stop PXL the green wires might instead be black. You don’t necessarily have to mark the wires, it does not matter which way they go, but I felt it was good practice regardless.
Unsolder these 3 wires. If you have an auto-stop PXL you will not have these wires and can skip this step.
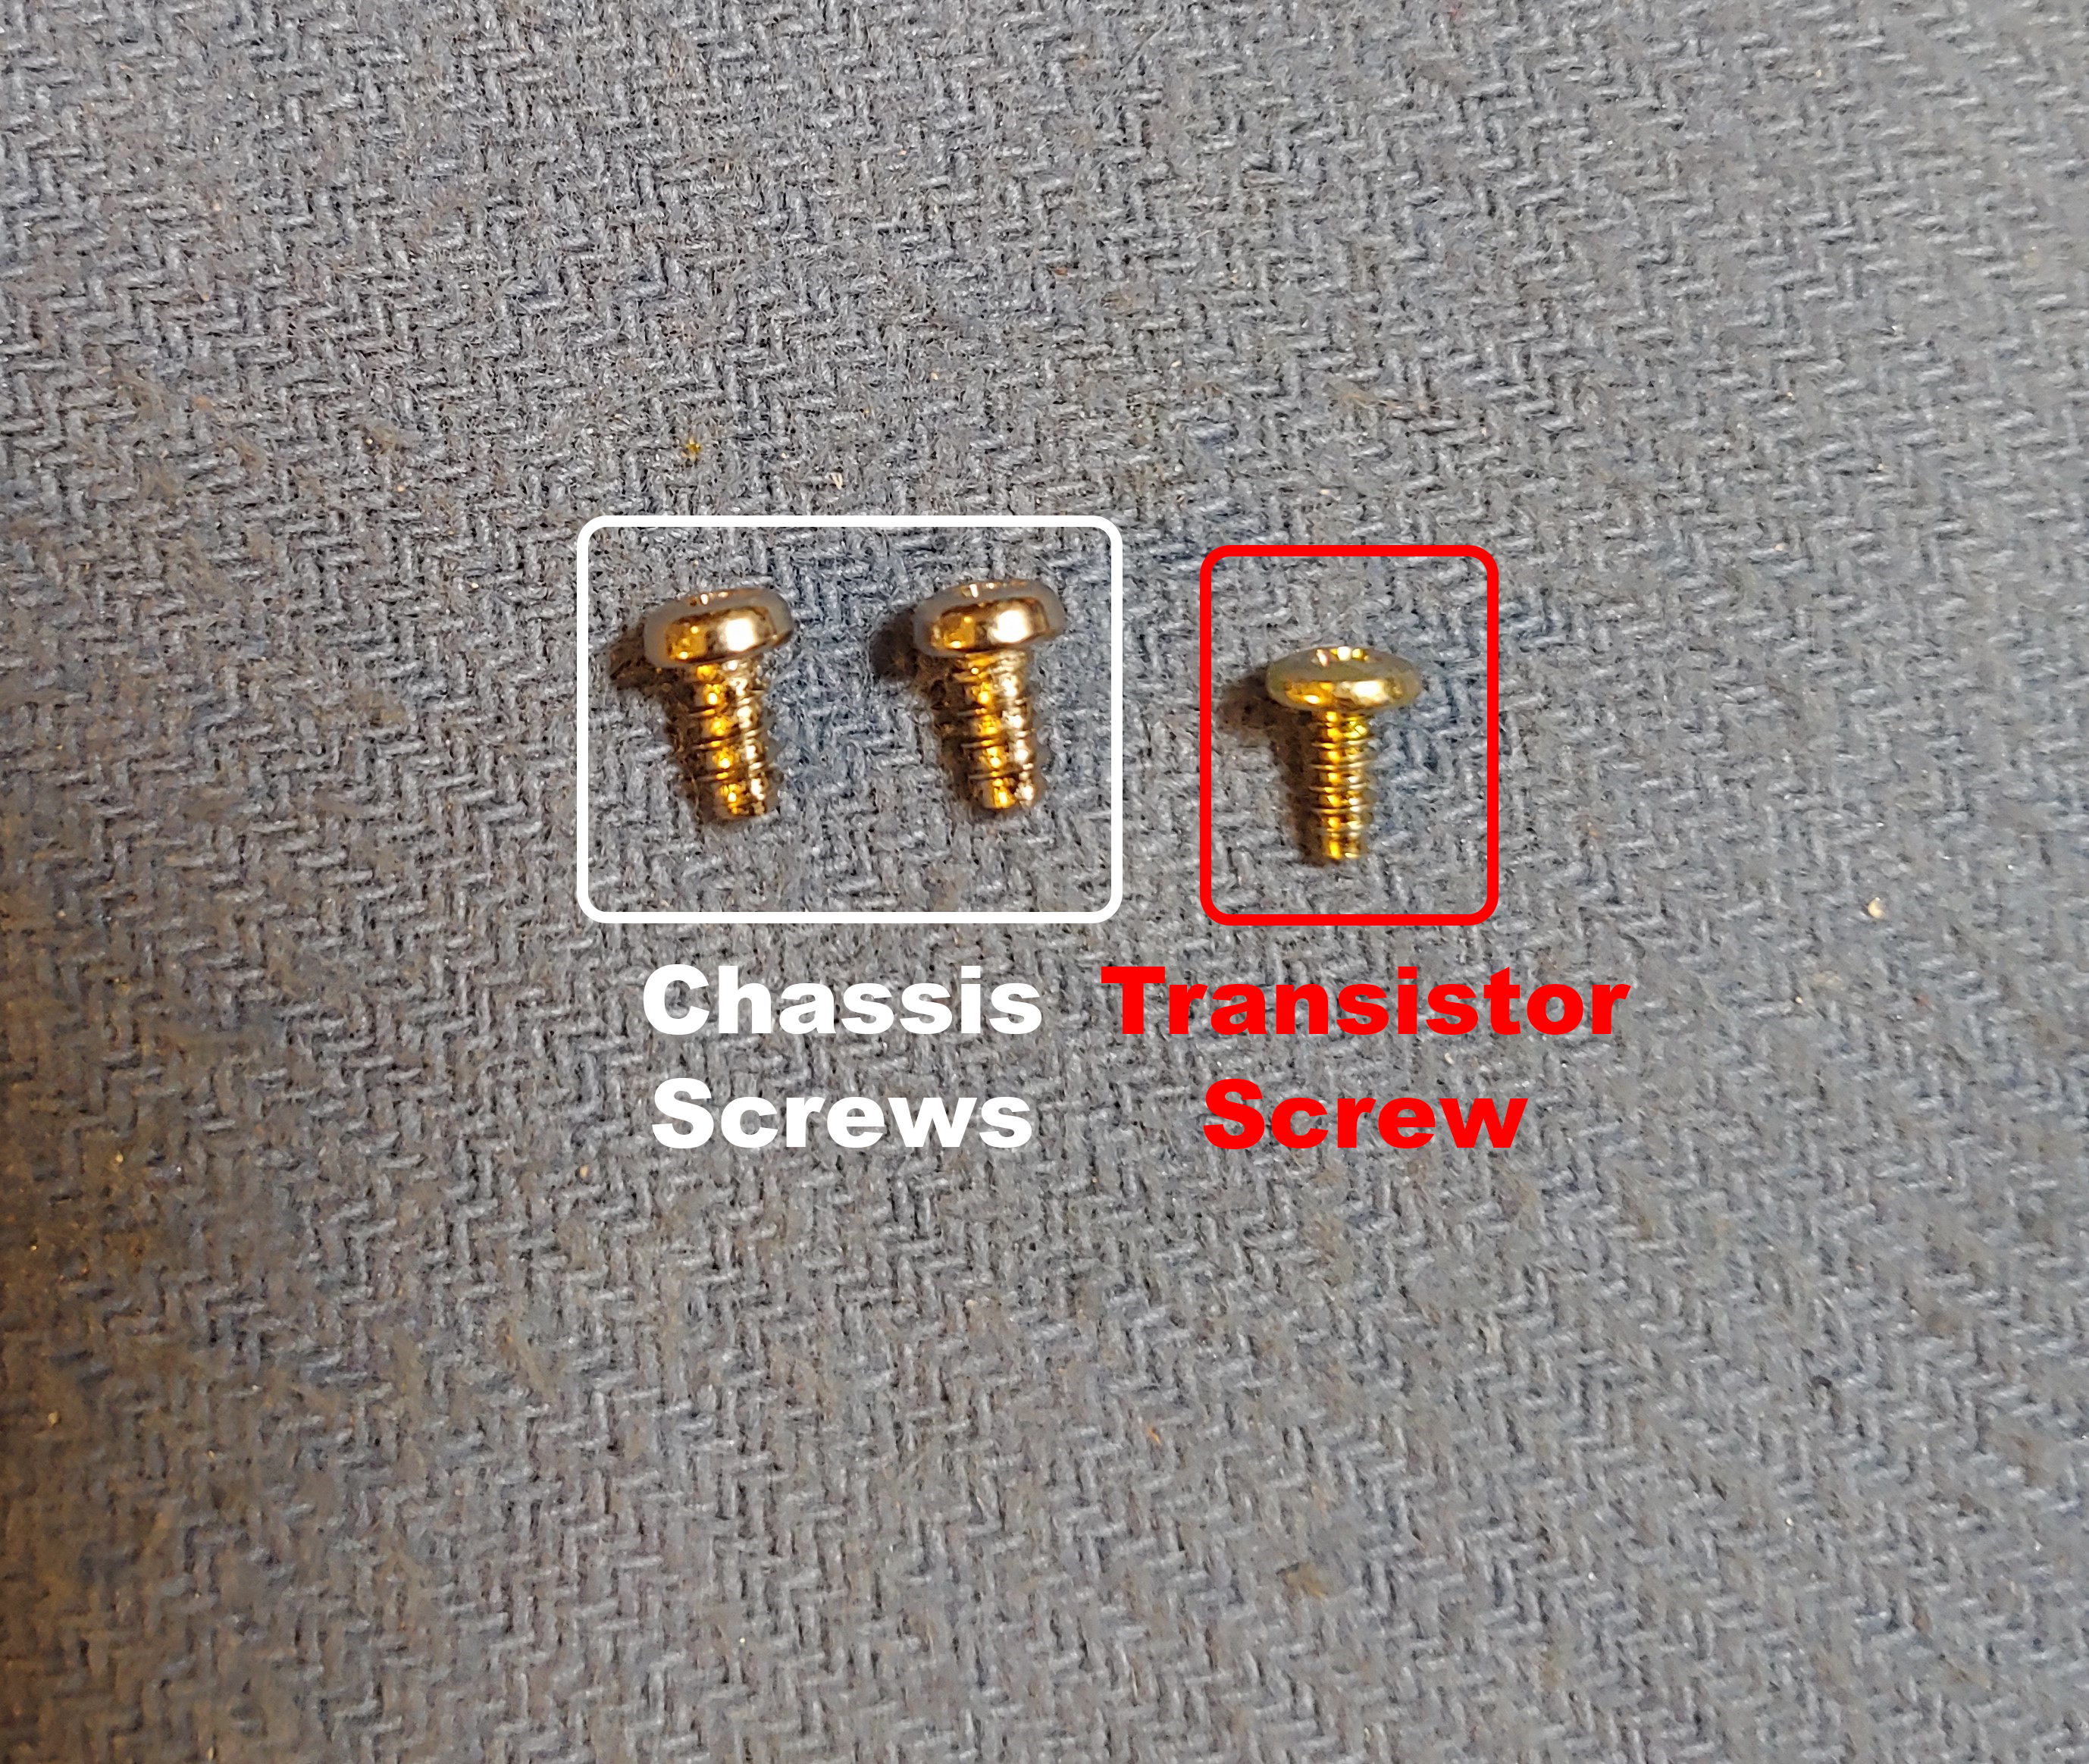
Remove these 3 screws. The inset view represents a different angle of the same screws.
Screw Inventory
This stanchion likes to get stuck and might require you to pull it to get the mechanism apart.
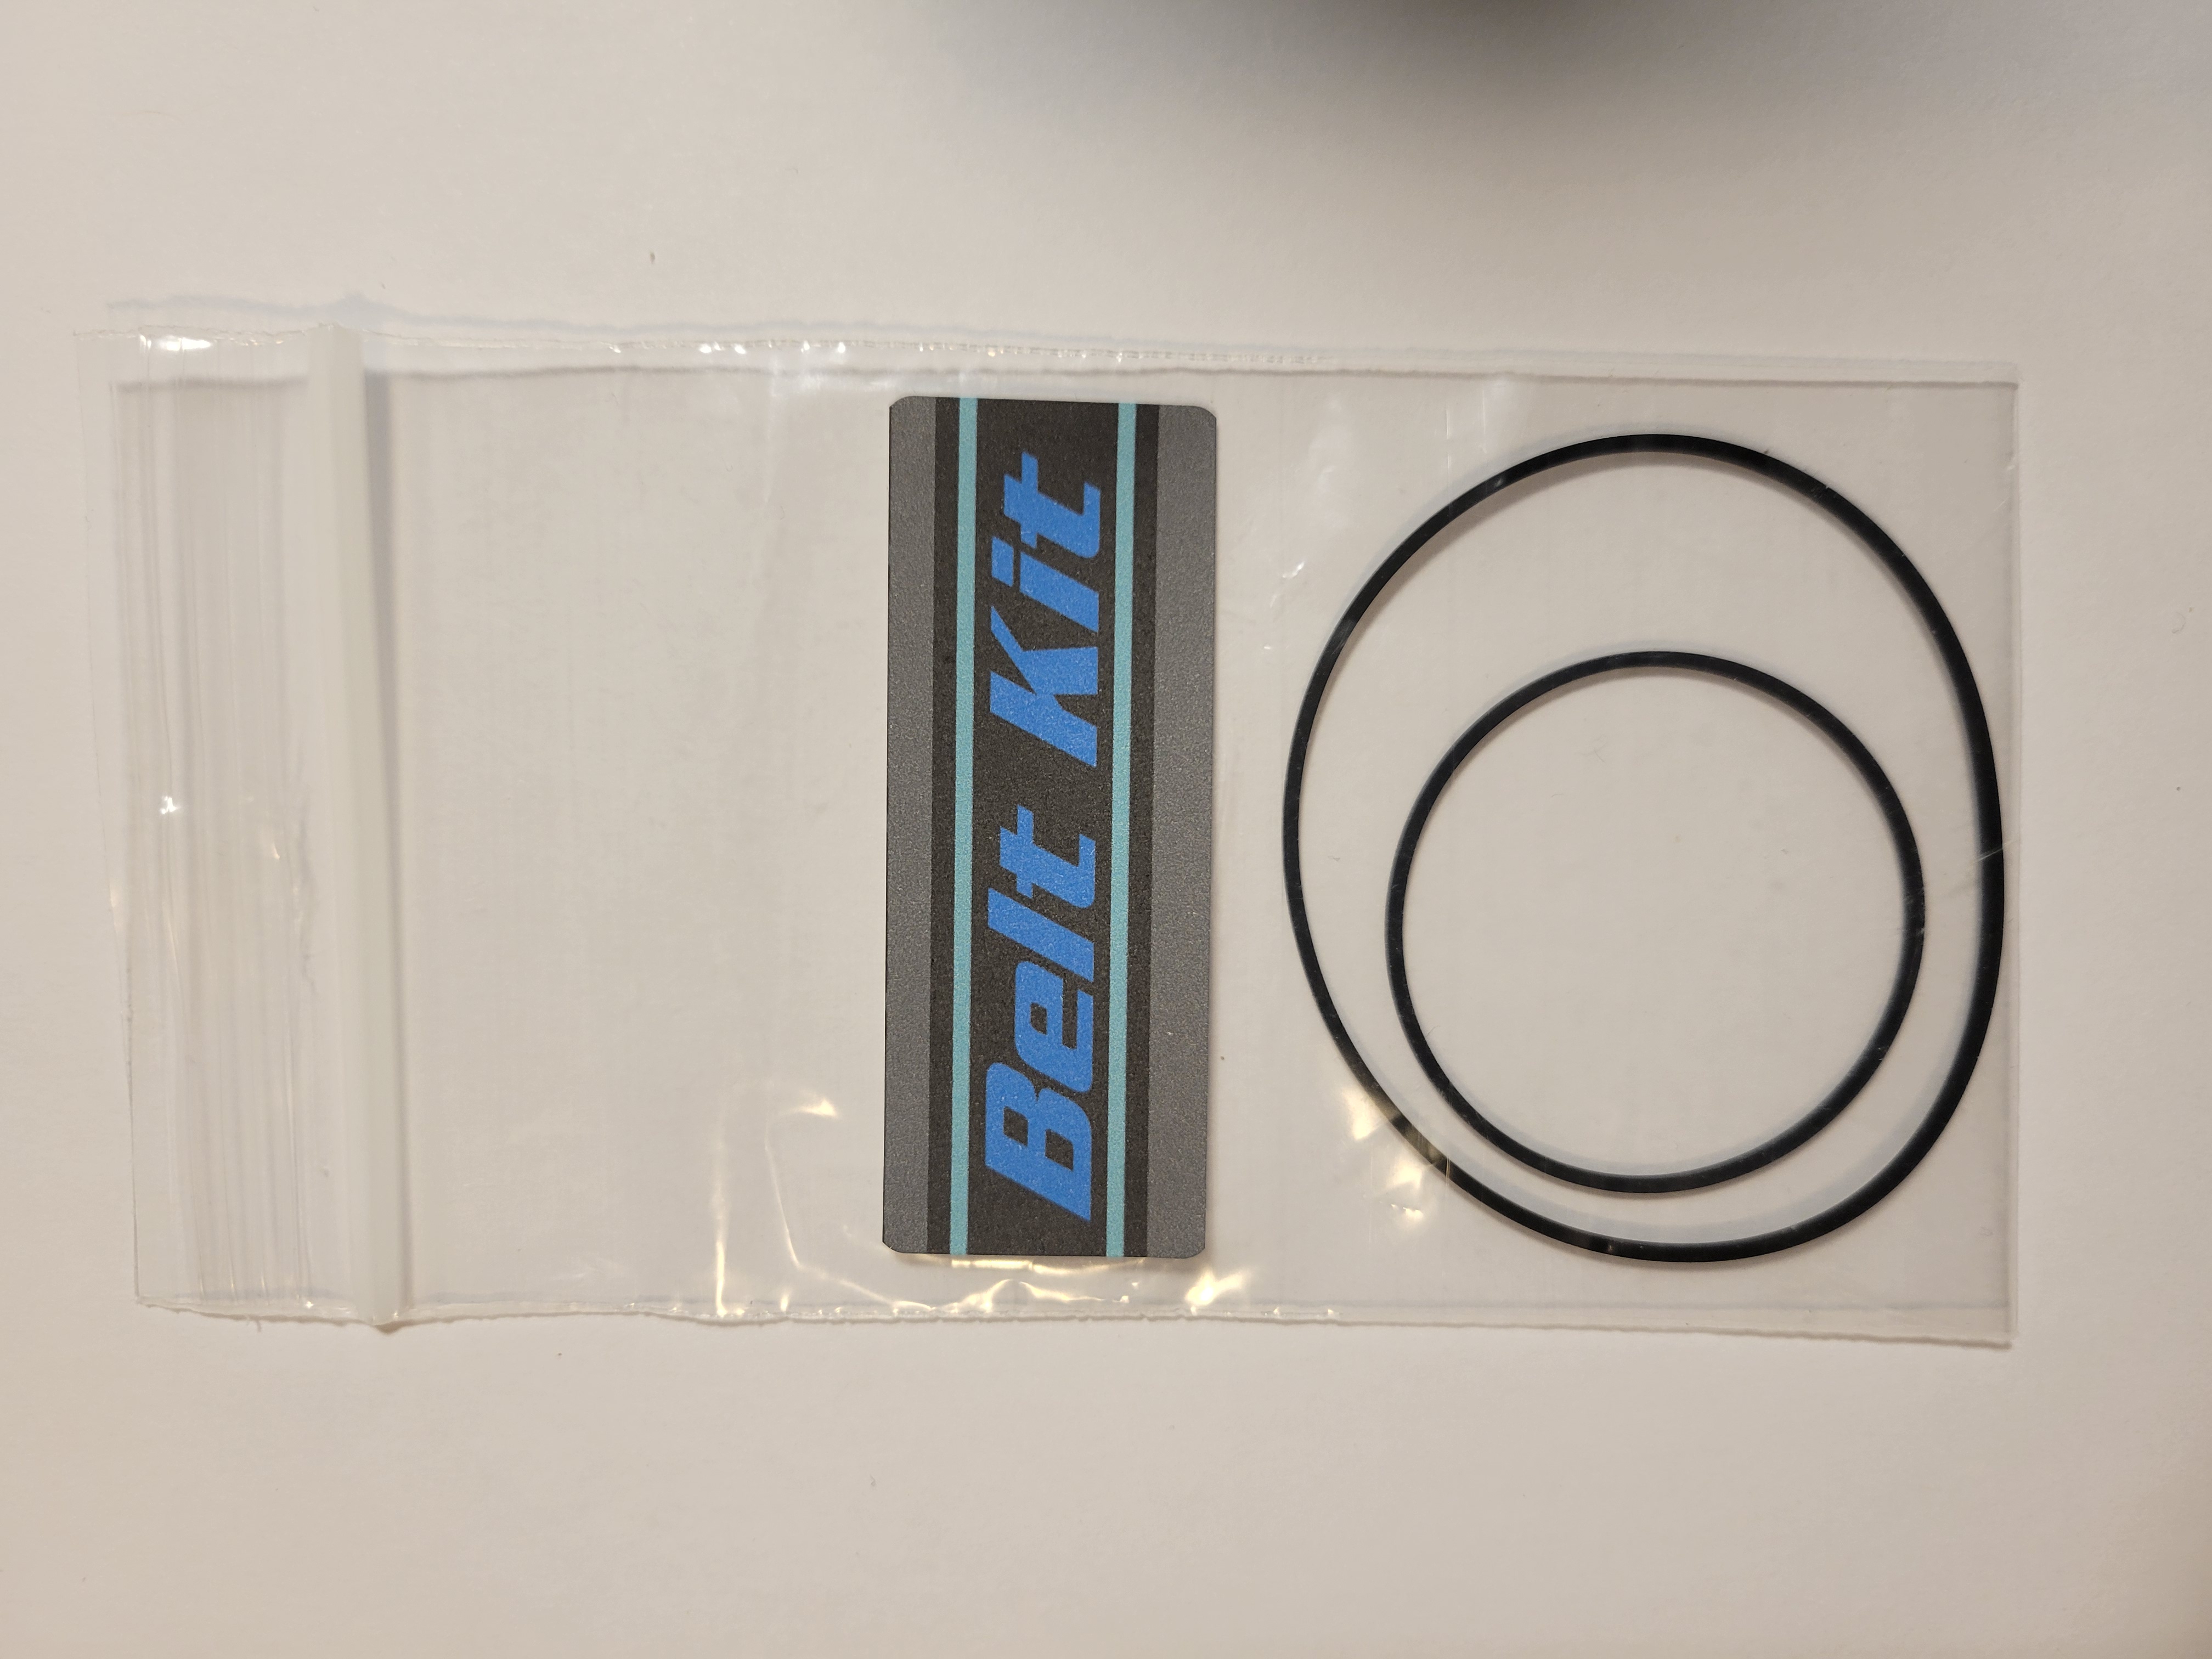
And we’re open! Now remove the old belts.
While we’re in here it’s a good idea to clean the belt path. This is some thread soaked in isopropyl alcohol. Make sure to get both belt path surfaces on the brass flywheel.
The belts for the PXL-2000 are 7.4 inchs and 5.1 inch diameter square drive belts, with a wall thickness of approximately 0.045 inches.
It is at this point I’ll address the elephant in the room by pointing out that I am at odds with myself by giving you this information, while also selling belt kits in the shop. (Most websites that sell belt kits refuse to give out the sizing information as that is their bread and butter). I will also tell you that you can find a set of belts elsewhere for a few dollars less than what I sell them for. Well for starters, the main goal of this website is to collect and disseminate information about the PXL-2000, not obfuscate it in the name of… what? Trying to squeeze a few bucks out of your ignorance? No. The information is free. That’s how it should be.
So with that I say, if you are utilizing this tutorial, I ask that you purchase belts from me. It really helps me maintain this website and historical project. Web hosting isn’t free, and product doesn’t exactly fly out the door for this extremely niche camera. I mainly maintain the shop to help keep the PXL-2000 alive and relieve some of the miscellaneous project costs. It is not paying my bills, lol. I do everything in my spare time and the small amount of money I bring in from the shop helps justify the absolutely monumental amount of time I’ve spent on this project. So if you’ve taken the time to read these few paragraphs, I say thank you. And if you’ve bought belts from me, I thank you twice.
Nice and fresh! You’ll never get the old ones mixed up with the new ones. When you install the new belts, make sure they are not twisted.
After you clean the belt path and install the new belts, go ahead and reassemble the cassette mechanism with the 3 screws from earlier.
If you are doing the “Extending the Wires” mod then stop here and go over to that tutorial. When it is posted I will add a link here.
If you are not planning on doing that mod then I will show you how to do a proper lineman splice to reconnect these wires.
First, identify which is which, and strip the ends. You may want to do this one at a time in order not to mix them up. In case you do, identifying them is easy. The connections are parallel, the left tab on the switch should be connected to the left eyelet in the circuit board and vice versa. (Note: Which way the wires go around technically doesn’t matter, but this is how it was on my camera and as good practice I wanted to do the same). Do not tin the wires at this time.
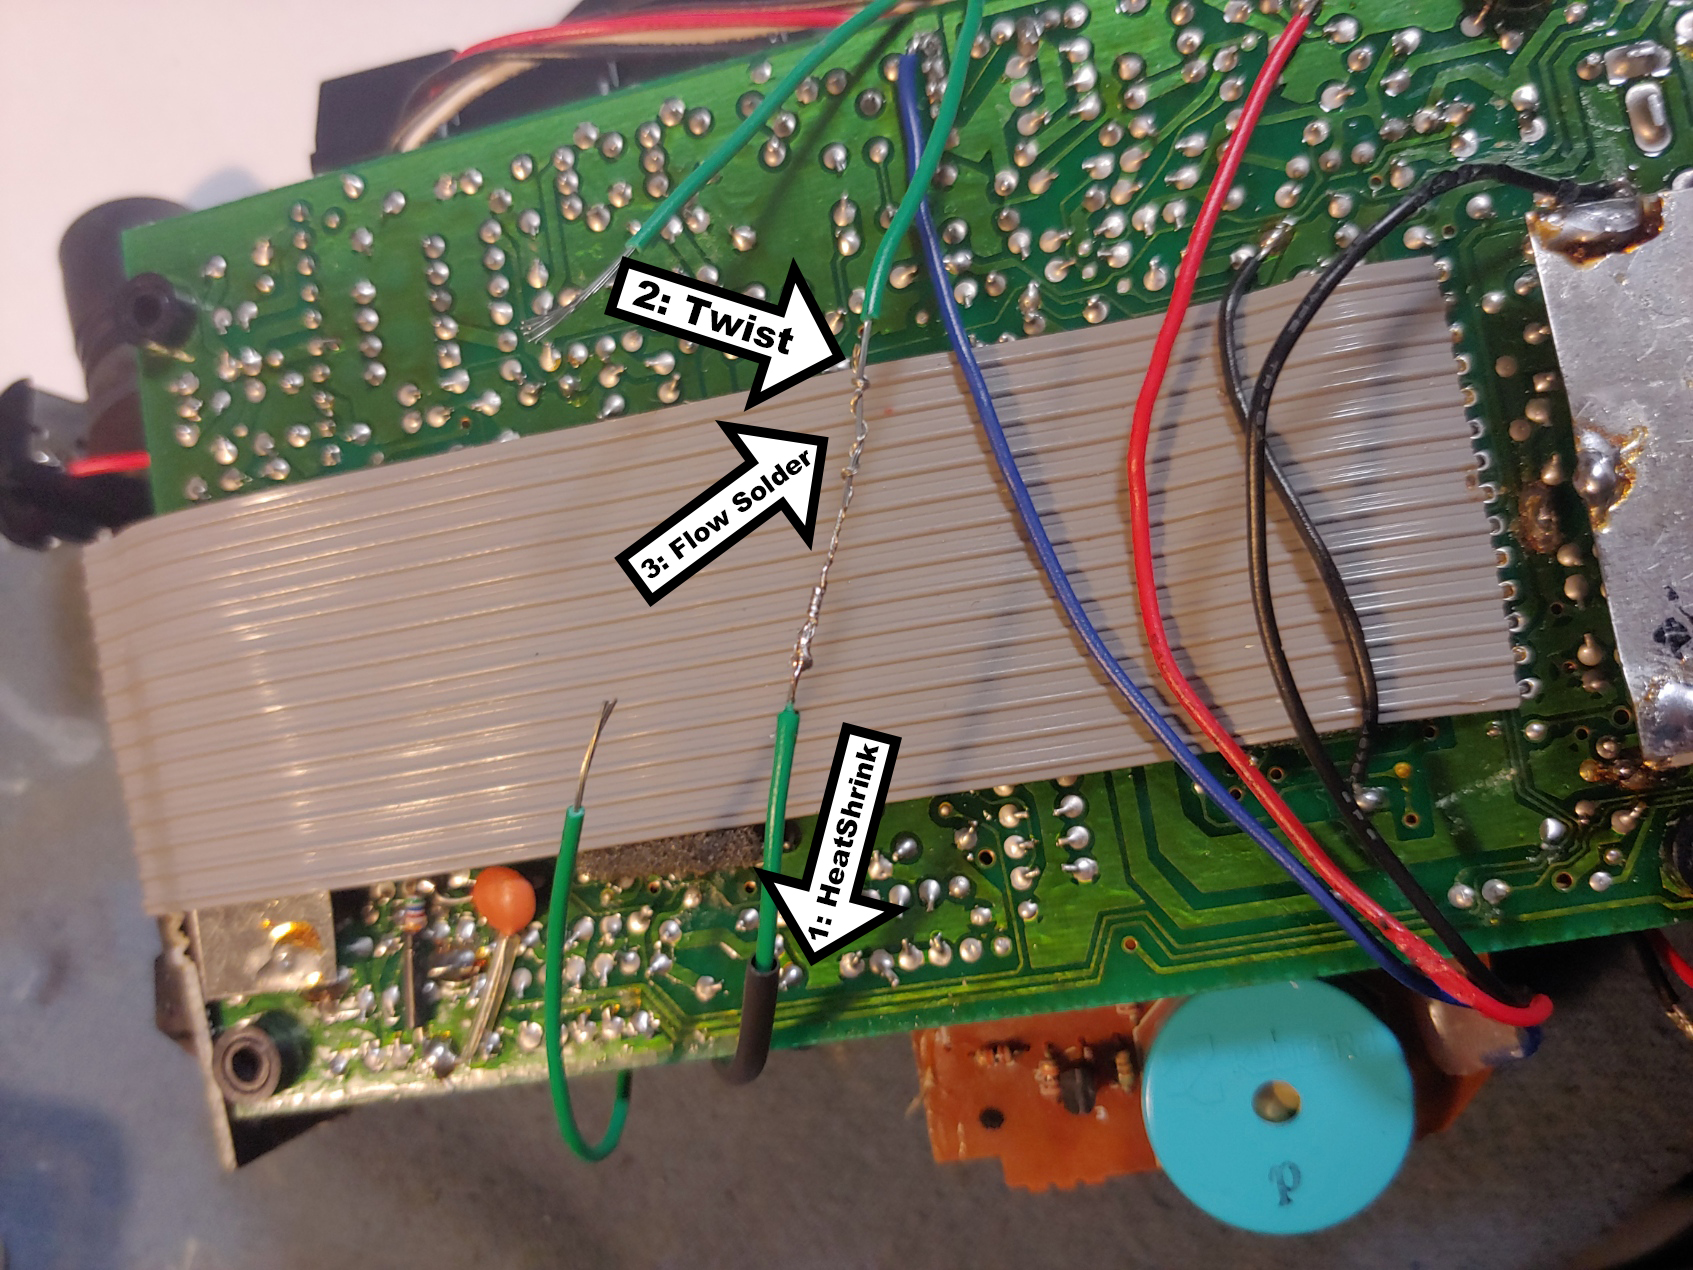
Take your spare wire and strip off a lot of the end. Twist that together with the existing wire and flow solder into the splice you’ve just made. I’m only flowing solder into the twisted portion of the wire because I want the end to remain pliable for the second splice.
VERY IMPORTANT! Do not forget to slip some heat shrink over the wire before you continue.
Twist the extended wire, and the remaining end together and flow solder in that second splice.
Wait for the joint to cool, slip the heat shrink tubing over it and heat it up to shrink it. The right way to do this is with a heat gun. I cheat and use a torch lighter but you gotta be careful not to burn things. Don’t use a bic or other soft flame lighter, as that will leave soot deposits everywhere.
Do the other wire using the same methods as the first.
Reconnect these 3 wires and we’re done! Belts replaced. If you have an auto-stop PXL you will not have these wires, in which case you’re already done!
Alternatively, you don’t have to reconnect these at all if you don’t want your camera to beep when it’s reached the end of the tape. If you want to do the most minimal mod you can simply leave the red wire disconnected and the camera will no longer beep. If you do this make sure to use heat shrink, tape, or mask off the end of the wire somehow so that it does not make an erroneous connection.